
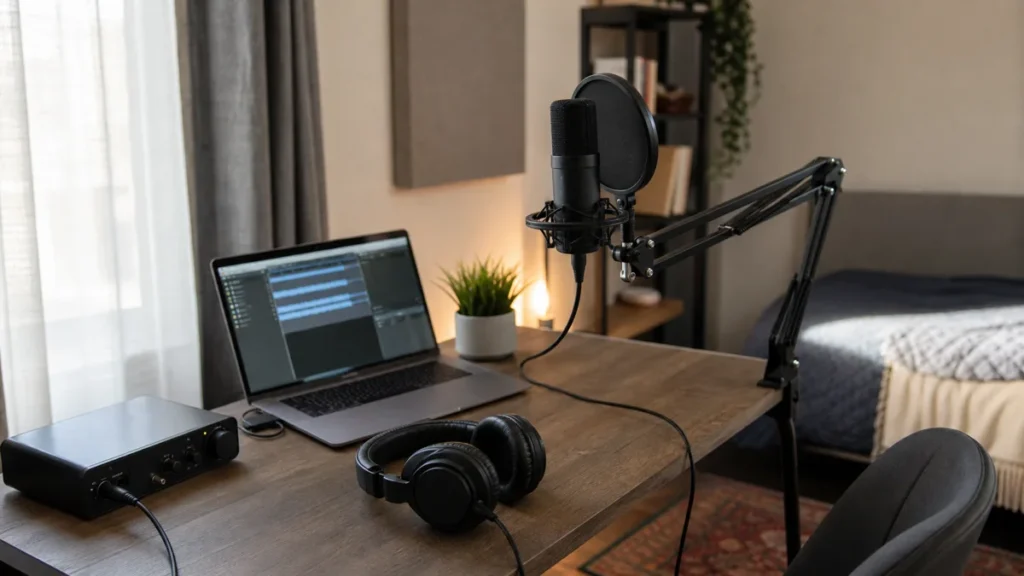
A small desk can work for vocal recording if the setup is stable, quiet, and easy to repeat. You do not need to build a fake vocal booth around your laptop. Start by placing the microphone where it can stay still, keeping noisy gear away from the mic, and making the headphone and cable path simple enough that you can focus on the take.
MusicalCritic may earn a commission from qualifying links. Illustrative bedroom recording setup; specific products are not pictured.
Quick Answer
For a bedroom desk vocal setup, put the microphone slightly away from the laptop and reflective wall, use a stable stand or boom arm, place soft materials behind or beside the singer, monitor with closed-back headphones, and record a short test before changing anything else. The goal is not soundproofing. The goal is fewer obvious reflections, less desk noise, and a repeatable recording position.
Who This Setup Is For
This setup is for beginner singers, rappers, podcasters, and songwriters who record in the same place they write, edit, or study. It works best when you have a small desk, a laptop, one microphone, headphones, and limited space for a full floor stand.
Who This Is Not For
This is not a plan for a professional treated vocal room, a portable isolation booth review, or a soundproofing guide. If outside noise is loud enough to enter the mic, a desk setup cannot fully remove it. If you need commercial-level isolation, you need a different room plan, not only a different desk accessory.
Start With A Stable Microphone Position
The microphone should not wobble, sink, or move every time you touch the desk. If your desk is solid and you have enough edge space, a clamp-on boom arm can save floor space. If your desk shakes easily, a floor stand may be safer because keyboard taps, mouse movement, and table bumps are less likely to travel into the mic.
Place the mic so you can sing comfortably without leaning over the laptop. A small turn away from the screen often helps because laptops, monitors, and bare walls can reflect sound back toward the microphone.
Keep Noisy Items Away From The Mic
Move the laptop fan, external drive, phone, and keyboard as far from the microphone as practical. If the laptop must stay on the desk, angle the microphone away from the fan side and record a short silence test before singing. Listen for hum, typing noise, fan ramps, chair movement, and cable taps.
Use Soft Surfaces Without Pretending They Are Soundproof
Soft furnishings can reduce obvious reflections in a bedroom, especially when the room has bare walls, a hard desk, and a window nearby. Curtains, a rug, a bed, and hanging clothes can help the recording feel less sharp. They do not soundproof the room, and they will not stop traffic, neighbors, or HVAC noise from reaching the microphone.
If the desk faces a bare wall, try turning the singer so the mic is not aimed directly at that wall. If there is a bed or curtain behind the singer, use it as a softer background. Record one short test, move one thing, and compare the result.
Choose The Stand Based On The Desk
| Desk situation | Better choice | Why |
|---|---|---|
| Solid desk with open edge space | Boom arm or desk clamp | Saves floor space and keeps the mic easy to position. |
| Light desk that shakes or flexes | Floor stand | Reduces desk bumps and keyboard vibration reaching the mic. |
| Very cramped desk | Small boom arm plus careful cable routing | Keeps the mic off the writing surface, but only if the clamp is secure. |
Route Headphones And Cables Before You Record
A good take can fail because the headphone cable pulls, the XLR cable crosses the keyboard, or the interface is out of reach. Put the interface or USB mic control where you can adjust headphone volume without moving the microphone. Leave enough cable slack for sitting or standing, but keep cables away from chair wheels and feet.
Five-Minute Setup Checklist
- Mic is stable and not touching a loose desk surface.
- Laptop fan and keyboard are not directly in front of the mic.
- Closed-back headphones are connected and comfortable.
- Pop filter or windscreen is positioned without blocking your view.
- Soft surfaces are behind or beside the singer, not only behind the mic.
- Input gain is set from a loud test phrase, not from whispering.
- A 10-second silence test is recorded and checked before the real take.
Common Mistakes
Do not surround the microphone with hard desktop objects and expect a clean sound. Do not buy a small vocal booth box and assume it will soundproof the room. Do not place the mic so close to the laptop that fan noise becomes part of every take. Do not raise input gain to fix headphone volume. Do not change five things at once after a bad test recording.
What To Read Next
For the full starter path, see home vocal recording. If you are choosing a stand, read best mic stands for small bedroom vocal recording. If plosives are the problem, compare foam windscreen vs pop filter for home vocals. If the room still sounds sharp, read how to reduce room echo for vocals without foam panels.
FAQ
Can a desk setup sound good enough for beginner vocals?
Yes, if the mic is stable, the room is not extremely noisy, and you check placement before recording. It will not replace a treated room, but it can be good enough for demos, practice vocals, and early releases.
Is a desk vocal booth worth it?
It depends on the problem. A small shield or booth may reduce some reflections, but it will not soundproof the room or fix bad mic placement. Beginners should solve stability, noise, and headphone routing first.
Should the microphone face the wall or the room?
Avoid aiming the mic directly at a bare reflective wall when possible. Try using the softer side of the room, such as curtains, a bed, or hanging clothes, and compare a short test recording.
Can I use a boom arm for vocals?
Yes, if the boom arm can hold the mic securely and your desk is solid enough. If the desk shakes, a floor stand may be less noisy.