
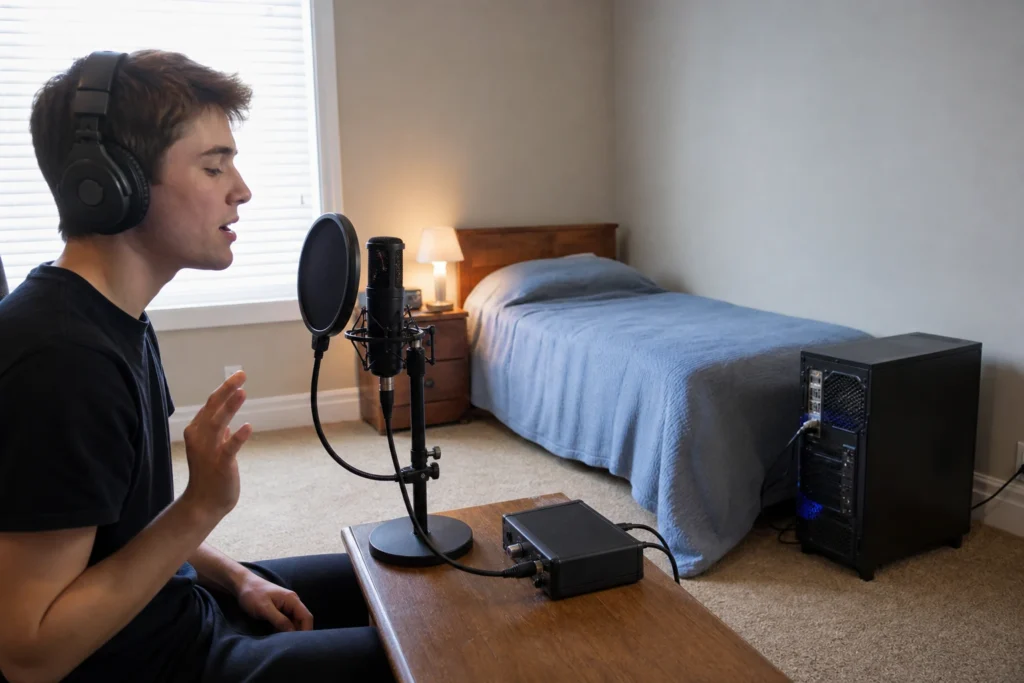
Bedroom Vocal Noise Workflow
Answer first: Reduce computer fan noise before recording by moving the computer farther from the microphone, pointing the mic away from the fan, recording closer to the voice, lowering unnecessary gain, and checking the take on headphones before adding noise reduction.
No microphone, stand, interface or plugin guarantees clean vocals if the fan is loud in the room.
Affiliate note: MusicalCritic may earn a commission from qualifying links. Editorial guidance is based on fit, setup needs, and source-backed research, not real-time price tracking or guaranteed outcomes.
Step 1: Move the Noise Source
If possible, put the computer under the desk, to the side, behind a soft barrier or farther from the microphone. Do not block ventilation or create a heat problem. The goal is to make the fan quieter at the microphone position, not just hide it visually.
Step 2: Change the Microphone Direction
Most beginner vocal mics have a front side and reject less useful sound from other directions. Point the sensitive side at the singer and keep the fan off to the rear or side when the microphone pattern allows it.
Step 3: Improve Voice-to-Fan Ratio
Record a little closer to the microphone, use pop control, and perform at a healthy level. A stronger vocal signal makes the fan less dominant. Do not move so close that plosives, boominess or clipping become the new problem.
Step 4: Set Gain From the Loudest Line
Extra input gain can make fan noise more obvious. Sing the loudest phrase, set the input so it does not clip, then listen to the quiet spaces between lines. If the fan is still obvious, move the source or microphone again before reaching for a plugin.
Step 5: Use Processing Last
Noise reduction can help some recordings, but it can also damage vocal tone or leave artifacts. Beginners should treat processing as cleanup after placement, not as the main fix.
Quick Test
- Record ten seconds of room tone with the fan running.
- Record one loud vocal phrase.
- Move the computer or microphone and repeat.
- Compare on closed-back headphones.
- Keep the setup that gives the cleanest raw take.
Read Next
- Home Vocal Recording for Beginners
- Best Dynamic Mics for Noisy Bedroom Vocals
- Is a USB Microphone Good Enough for Vocals?
FAQ
Will a dynamic microphone remove fan noise?
No. A dynamic mic can help with close vocal workflow, but it does not remove a fan that is loud at the mic position.
Should I use noise reduction while recording?
Beginners should usually capture the cleanest raw take first. Add noise reduction carefully after checking placement and gain.
Can I put a blanket over my computer?
No. Do not block ventilation. Move the computer, change mic direction or record when the fan is quieter instead.