
Review-Basis Note
This guide is based on beginner home-recording workflow logic, public manufacturer education, MusicalCritic's existing home-vocal content model, and editorial judgment. It does not claim hands-on testing, live price verification, retailer inventory checks or brand sponsorship.
Price note: Gear prices change. Check current prices before buying and treat USD 200 as a budget target, not a guaranteed checkout total.
Answer-First Summary
Under USD 200, most beginners should choose one of two starter paths: a USB microphone plus closed-back headphones for the simplest setup, or an entry-level XLR microphone plus a basic audio interface if they want a clearer upgrade path. The right choice depends on room noise, whether you need to record instruments later, and whether you are willing to manage gain, monitoring and extra cables.
Do not spend the whole budget on one microphone first. A stable stand, pop filter, closed-back headphones and a quiet recording position often matter more than a more expensive mic in a noisy bedroom.
Quick Recommendation
| If you are this user | Start here | Why |
|---|---|---|
| You want the fewest setup steps | USB mic + closed-back headphones + stand/pop filter | One cable, fewer routing decisions and easier first recordings. |
| You want to upgrade over time | XLR dynamic mic + basic interface + XLR cable + headphones | More flexible and easier to replace one part later. |
| Your room is noisy or untreated | Close-position dynamic mic path | A less sensitive close mic can be more forgiving than a bright condenser in a reflective room. |
| You also record guitar or keyboard | XLR/interface path | The interface can handle more sources later. |
| You mainly need voice notes, demos or content | USB path | Simplicity is more valuable than upgrade flexibility at the start. |
What USD 200 Can Realistically Cover
A beginner budget can cover the basic recording chain, but only if you avoid buying too many extras too early. Think in terms of a complete working setup, not a single impressive product.
Your first setup usually needs:
- A microphone.
- A stable stand or boom arm.
- A pop filter or windscreen.
- Closed-back headphones.
- A computer or recording device.
- For XLR mics only: an audio interface and XLR cable.
Depending on current prices, a USD 200 budget may not cover a high-end microphone, premium headphones and a strong interface at the same time. If the total goes over budget, keep the chain simple and spend first on the pieces that prevent unusable recordings: mic placement, monitoring and cable reliability.
Path 1: USB-First Setup
A USB-first setup is the simplest way to start recording one vocal at a time. The microphone connects directly to the computer, so you do not need a separate interface or XLR cable.
Best for:
- First vocal demos.
- Beginner singers.
- Simple podcast or creator voice recordings.
- Laptop setups.
- Users who do not want to learn interface gain and driver settings immediately.
Watch-outs:
- Upgrade options are limited because the mic and interface are built into one device.
- You usually cannot record multiple microphones at once.
- Monitoring features vary by model.
- A sensitive USB condenser can still capture room noise.
Beginner buying order:
- USB microphone.
- Closed-back headphones.
- Stand or boom arm.
- Pop filter or windscreen.
- Simple recording software.
Path 2: XLR Mic Plus Interface Setup
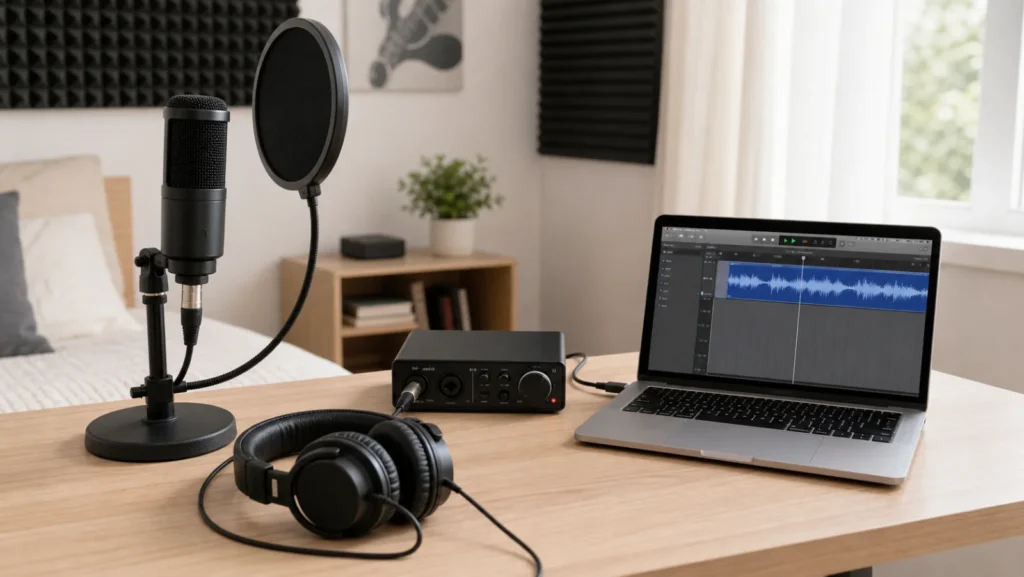
An XLR setup adds more decisions, but it gives you more room to grow. The microphone connects to an audio interface with an XLR cable, and the interface connects to your computer.
Best for:
- Singers who expect to keep recording.
- Users who may add guitar, keyboard or a second microphone later.
- Beginners who want access to common studio-style microphones.
- People who want separate control over microphone, interface and headphones.
Watch-outs:
- You need more parts.
- You must set input gain correctly.
- Some condenser microphones require phantom power.
- Driver and monitoring setup can confuse beginners.
Beginner buying order:
- XLR microphone.
- Basic audio interface.
- XLR cable.
- Closed-back headphones.
- Stand and pop filter.
USB vs XLR Under USD 200
| Decision point | USB-first | XLR/interface-first |
|---|---|---|
| Setup difficulty | Easier | More steps |
| Upgrade path | Limited | Better |
| Cable count | Lower | Higher |
| Interface required | No | Yes |
| Good for one vocal | Yes | Yes |
| Good for adding instruments later | Usually weaker | Better |
| Best beginner reason | Fast start | Long-term flexibility |
| Biggest risk | Outgrowing the all-in-one setup | Buying too many parts without learning gain and monitoring |
What Not To Buy First
Avoid these early mistakes:
- Do not buy a premium condenser mic before checking room noise.
- Do not buy studio monitor speakers if you are recording vocals in the same room; headphones matter first.
- Do not buy plugins before the vocal is clean at the source.
- Do not buy a complex interface if you only record one voice.
- Do not buy cheap unstable stands that sag or transmit handling noise.
- Do not spend the whole budget on a mic and leave no money for headphones or a pop filter.
Room Noise Rule
In a bedroom or apartment, room control matters as much as gear choice. A sensitive mic in a reflective space can make beginner vocals sound harsh, distant or noisy. Before upgrading the microphone, test the room.
Use this checklist:
- Turn off fans, loud computers and unnecessary appliances.
- Record away from bare walls and windows.
- Keep the mic close enough for a strong vocal signal.
- Use closed-back headphones so the backing track does not leak into the mic.
- Lower gain if the recording clips or captures too much room tone.
- Try a different corner or softer room before buying more gear.
Minimum Setup Examples By Goal
Simple singer-songwriter demo
Choose a USB microphone, closed-back headphones, a stable stand and a pop filter. This keeps the setup simple and lets you focus on singing, lyrics and arrangement.
Beginner who wants to grow into a home studio
Choose an XLR microphone, a basic interface, an XLR cable, closed-back headphones and a stand. This path makes more sense if you will later record guitar, keyboard or different microphones.
Noisy apartment vocal setup
Choose a close-position microphone approach, prioritize a stable stand and record in the quietest part of the room. Do not assume a more sensitive mic will fix the problem.
First Upgrade Path
After the first setup works, upgrade in this order:
- Better room position or simple acoustic control.
- More reliable stand and pop filter.
- Better closed-back headphones.
- Better interface or microphone, depending on your current weak point.
- Basic editing and gain-staging workflow.
- Only then consider plugins, premium microphones or monitors.
FAQ Module
Is USD 200 enough for beginner vocal recording?
It can be enough for a simple beginner setup if you choose carefully and avoid unnecessary extras. The goal is a complete working chain, not a professional studio.
Should I buy a USB mic or an audio interface first?
Buy a USB mic first if you want the easiest one-person setup. Buy an interface first only if you are choosing an XLR mic or want a setup that can grow to instruments and other microphones.
Do I need studio monitors for recording vocals?
No. Beginners usually need closed-back headphones first. Studio monitors can cause bleed into the microphone if they play while recording in the same room.
What matters more: microphone or room?
For beginners, the room and mic position often matter as much as the microphone. A good mic in a noisy or reflective room can still sound bad.
Should I buy plugins first?
No. Get a clean vocal recording first. Plugins can help later, but they cannot fully repair bad room noise, clipping, unstable mic placement or headphone bleed.
Related MusicalCritic Paths
- Home vocal recording guide
- Beginner setup checklist
- Reduce room noise before buying gear
- Beginner USB microphones
- Mic stands for home recording
- XLR cables for home studios
- Audio interfaces hub
- Headphones hub
Next: Use the beginner setup checklist before choosing gear.
How We Test
Review basis: based on beginner home-recording workflow logic, public manufacturer education, existing MusicalCritic content and editorial judgment. No hands-on testing, live price verification, inventory check or sponsorship is claimed.